Configuring Single Sign-On (SSO) and Role-Based Access Control (RBAC)
Enabling HTTPS
ON-PREMISES
Following this procedure will allow you to enable the Single Sign-On, then the Role-Based Access Control.
This procedure requires a validate certificate to enable HTTPS.
Open the Internet Information Services (IIS) Manager application.
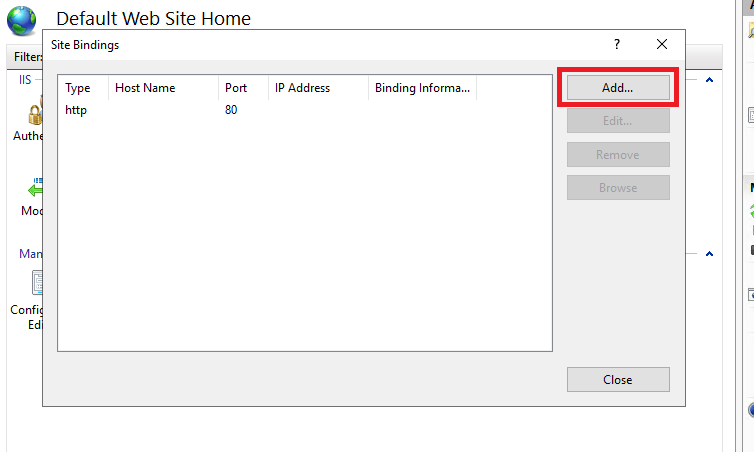
Go on the Web application, then click Bindings…
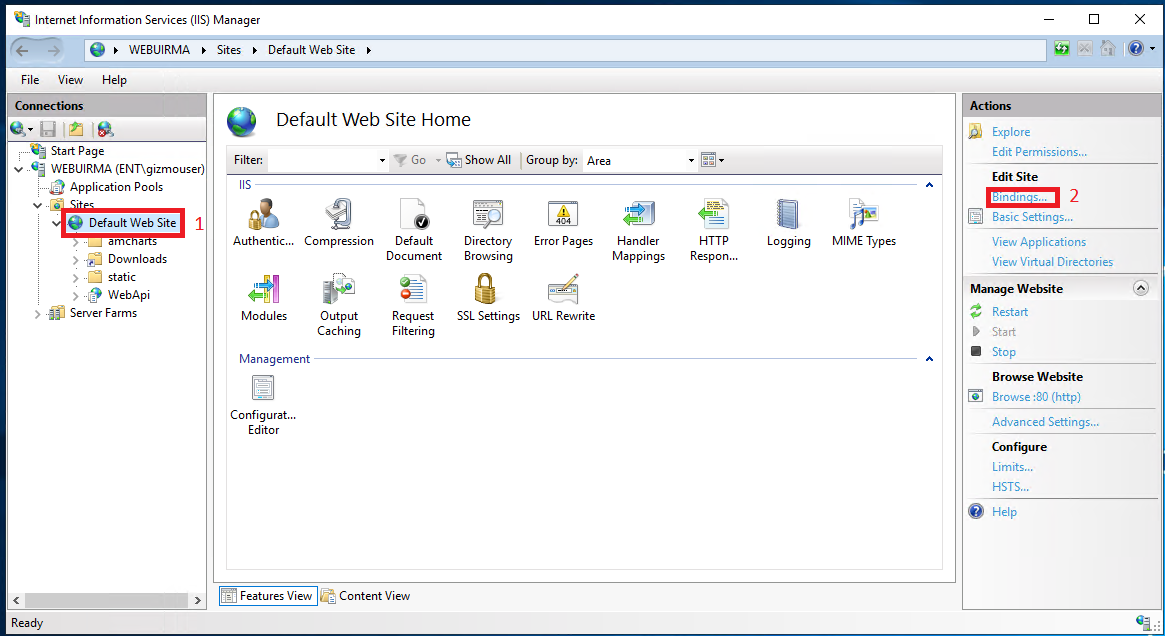
Click Add…
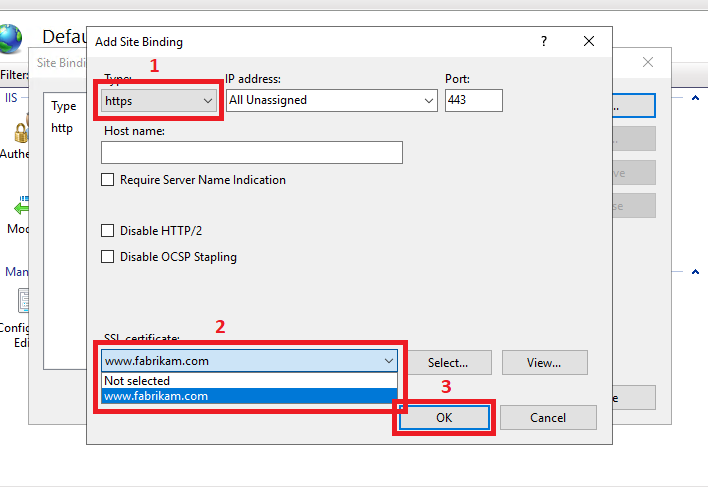
Select https in the Type drop-down list.
Select your SSL certificate.
Click OK.
Gizmo application is now listed on ports 80 and 443 (HTTP and HTTPS).
Restart IIS Manager.
Configuring Single Sign-On (SSO)
HTTPS must be enabled.
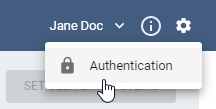
In Gizmo application, access the Authentication page using the top-right Settings button.
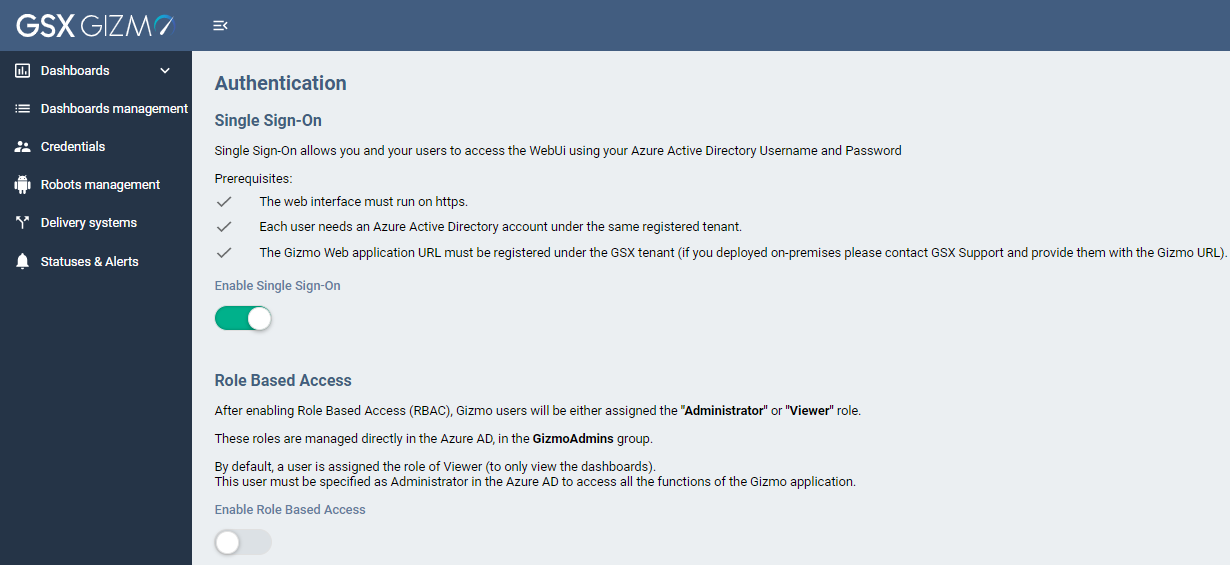
In the Authentication page, enable the Enable Single Sign-On button.
You are now redirected on Azure Login page.
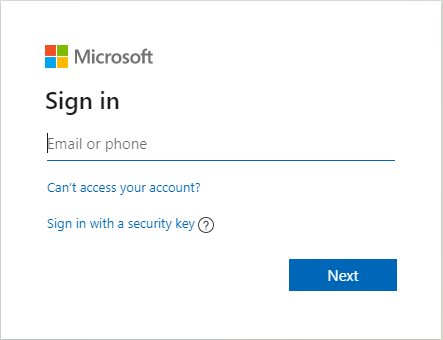
Enter your credentials to log in.
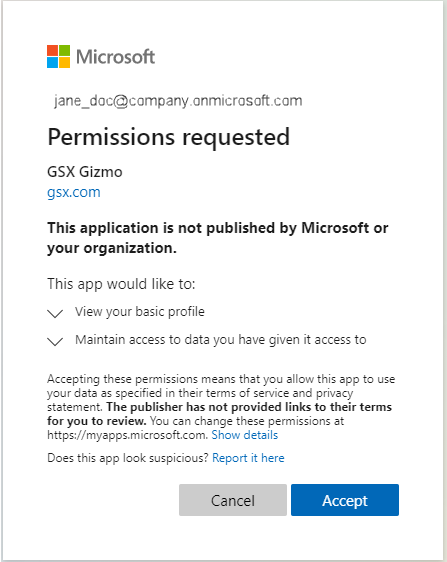
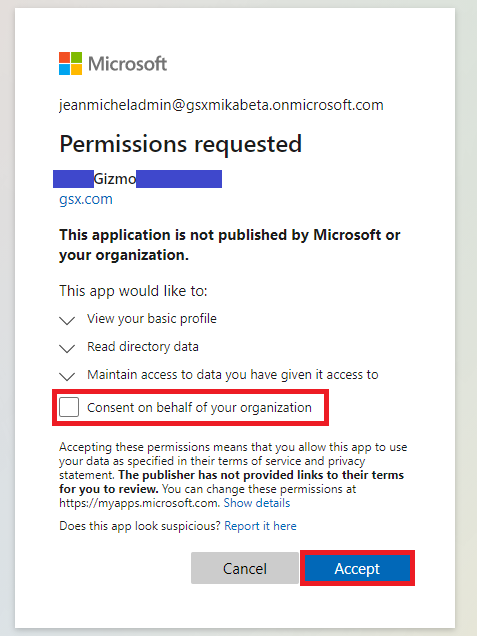
At first enabling, a requested permissions is asked.
Accept the permissions by clicking Accept.
You are now redirected on Gizmo application and logged in with your account.
Configuring Role-Based Access Control
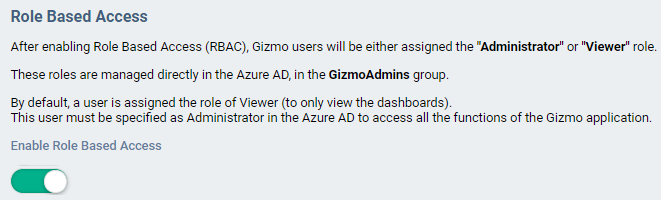
Gizmo users are assigned the role of Viewer or Administrator.
These roles are managed directly in the Azure AD of your company.
By default, a user is assigned the role of Viewer (to only view the dashboards).
In order to access all the functions of the Gizmo application (editing dashboards, editing credentials, etc.), this user must be specified as Administrator in the Azure AD.
Viewer profile
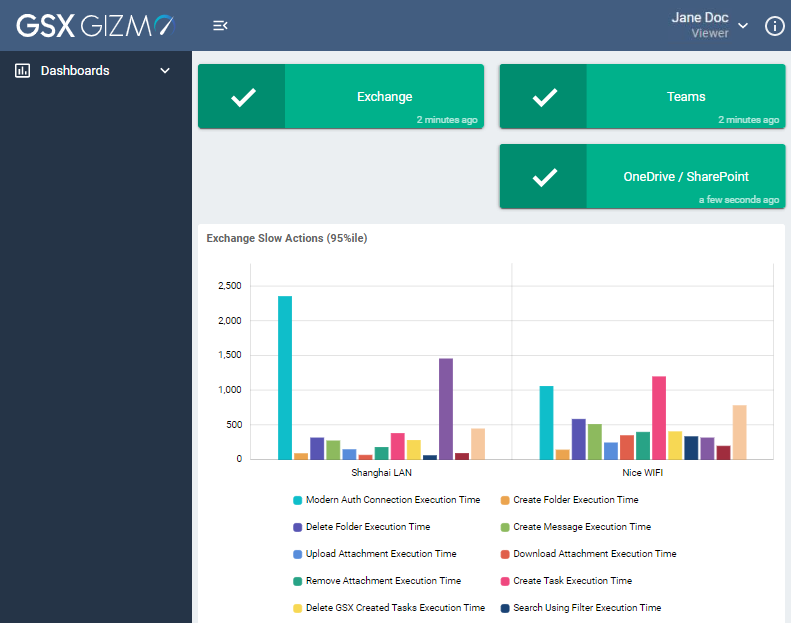
This is the feature a Viewer user can access in the web application.
The Viewer user can also access the “info” menu at the top-right of the page, to display the current Gizmo version.
Administrator profile
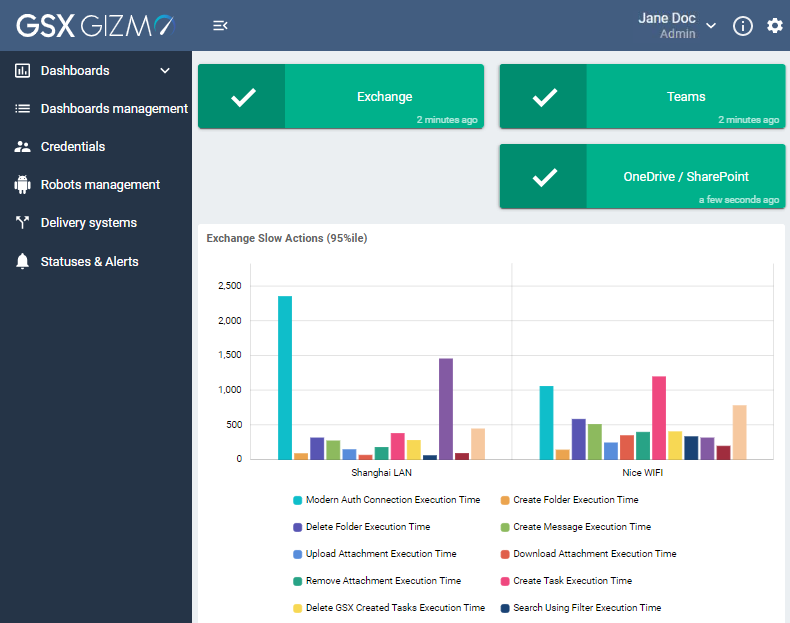
These are the features an Administrator user can access in the web application.
The Administrator user can also access at the top-right of the page:
The “info” button to display the current version.
The “settings” button to activate the Single Sign-On (SSO) and Role-Based Access Control (RBAC) options.
This procedure must be done in the Azure AD of your company.
Registering members in a group
In your organization tenant, create a group named GizmoAdmins (not case-sensitive).
Click on Create.
Add the members who will be Administrators in Gizmo application.
Enabling Role-Based Access Control
Two procedures are possible to consent the RBAC.
Consent from Azure AD client portal
A client Azure AD Administrator account is required.
In Azure AD Enterprise application, go to Permissions.
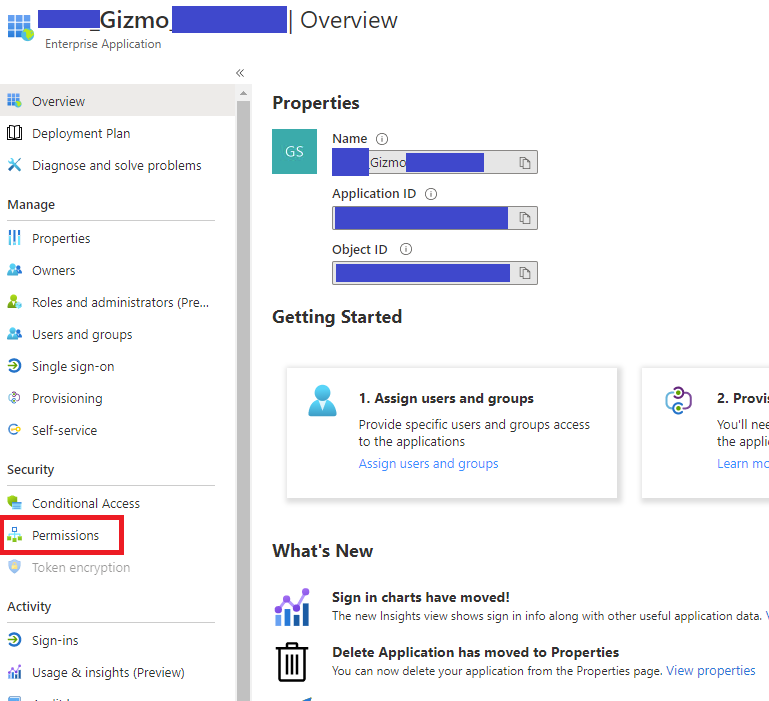
Grant the Administration rights for your organization tenant.

Consent and enabling from Gizmo application
Single Sign-On must be enabled.
You need a client account which is administrator of the tenant and part of the GizmoAdmins group.
In Gizmo application, access the Authentication page using the top-right Settings button.
In the Authentication page, enable the Role-Based Access button.
At first enabling, a requested permissions is asked.
Only a tenant Administrator is able to accept it.
Check Consent on behalf of your organization.
Click Accept to confirm.
You are redirected to Gizmo application and RBAC is now enabled.