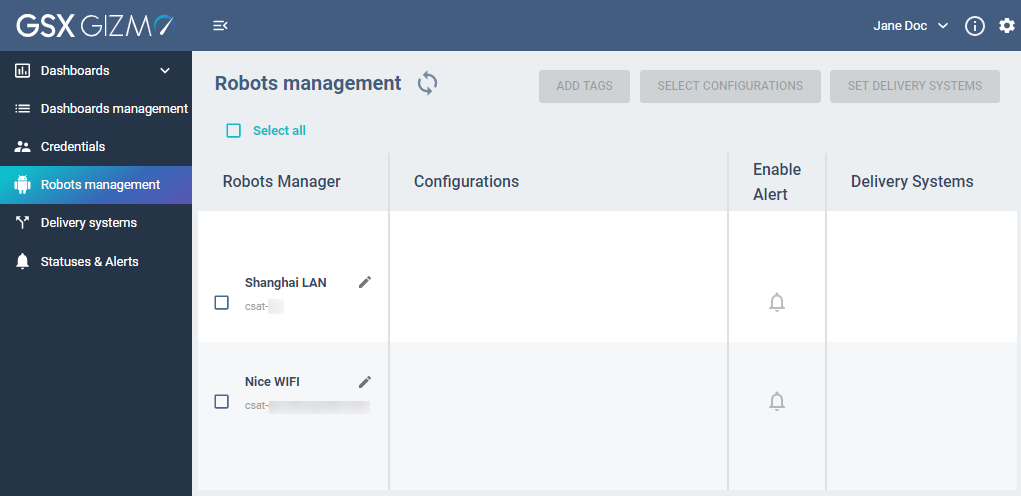
Robots management
Ensure you have installed your Robot Manager(s) on dedicated machine(s).
If not, please follow Install Robot Manager(s)
This page is displaying all installed Robot Managers:
with their names and dedicated machines,
attached configurations,
attached enabled/disabled alerts,
attached delivery systems.
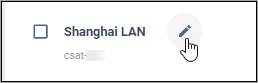
You can easily rename the Robot Manager using the edition mode button.
Adding Configurations to Robot Managers
Select the Robot Manager to be configured.
You can select several Robot Managers at once.
Click the Select configurations button. The Select configurations panel opens.
Select as many Configurations as you need with the drop-down list.
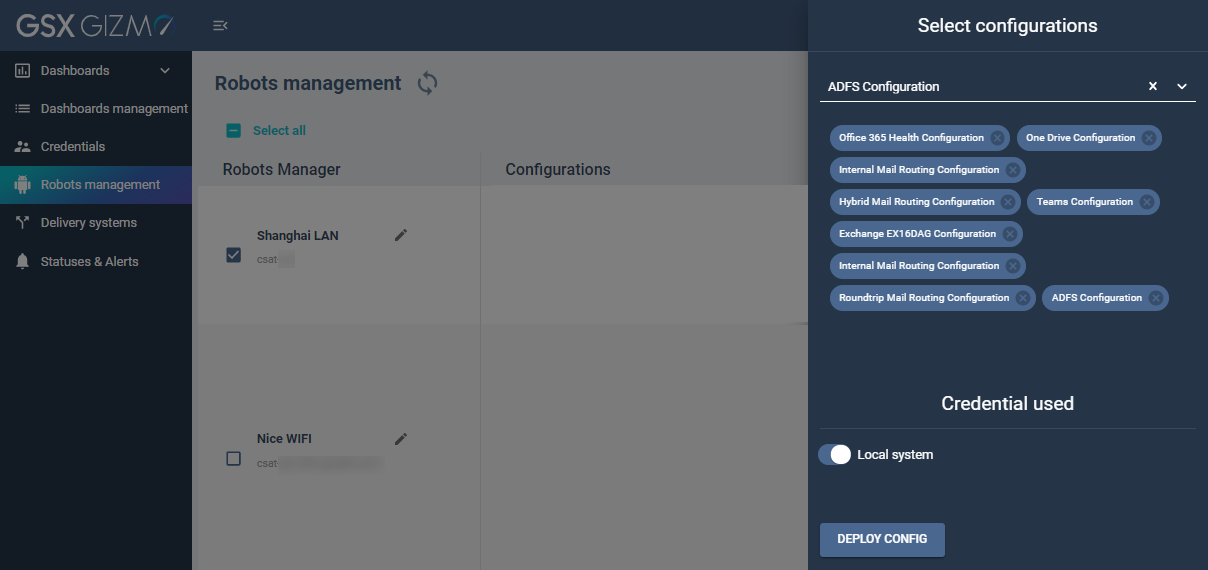
The Credential used section allows you to use Local system credentials or others.
Then click the Deploy Config button. Configurations are now set for the Robot Manager.
Configurations can easily be removed by clicking on the little cross in the label.
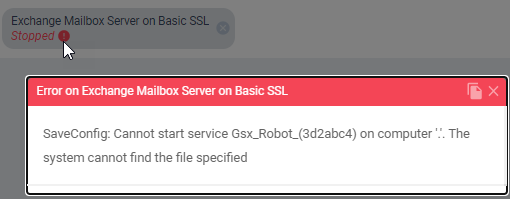
Configuration Status
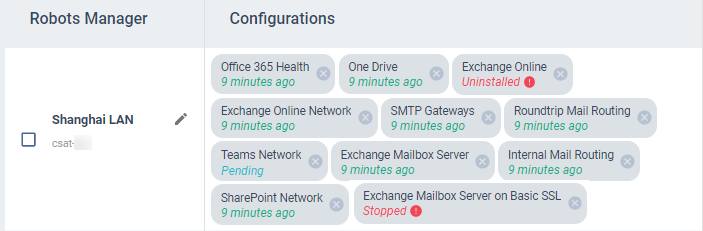
As you can see, several statuses are possible for a Configuration.
Green status indicates when the last scan occurred.
Blue status is the Pending status: it means scanning is in progress.
Red status is used when an issue appears on the configuration.
Then a tooltip is visible: click on it to display more details.
Adding Tags to Robot Managers
Dedicated tags allow you to facilitate the Robots sorting and display.
A tag is a combination of a key and a value. Tags with the same key are displayed in a same color.
These tags will be used in the Delivery systems page and allow you to base your alerts on specific thresholds.
Select the Robot Manager to be configured.
You can select several Robot Managers at once.
Click the Add tags button. The Add tags panel opens.
Enter the Key and the Value. Click the + button to confirm this tag.
Create as many tags as you need or reuse existing ones.
Setting “Location” tags to the city names is essential. It allows Gizmo Analytics Power BI to display robots on a map.
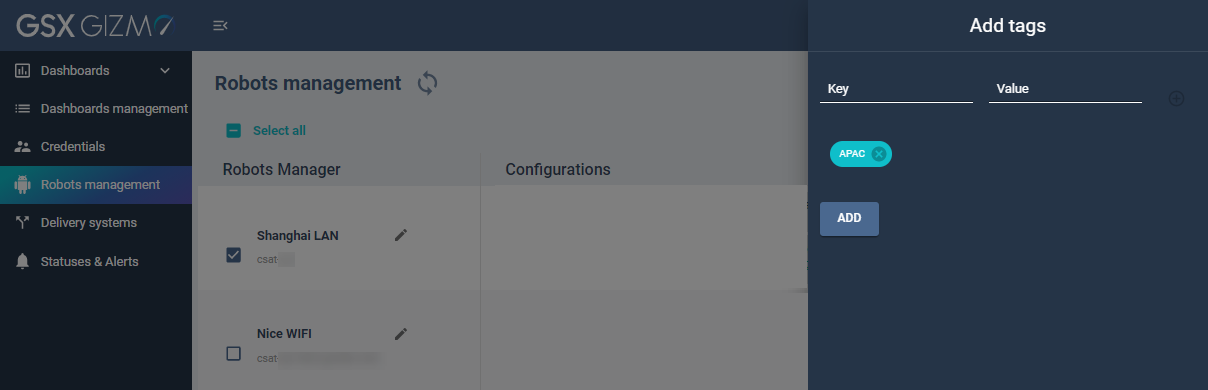
Then click the Add button.
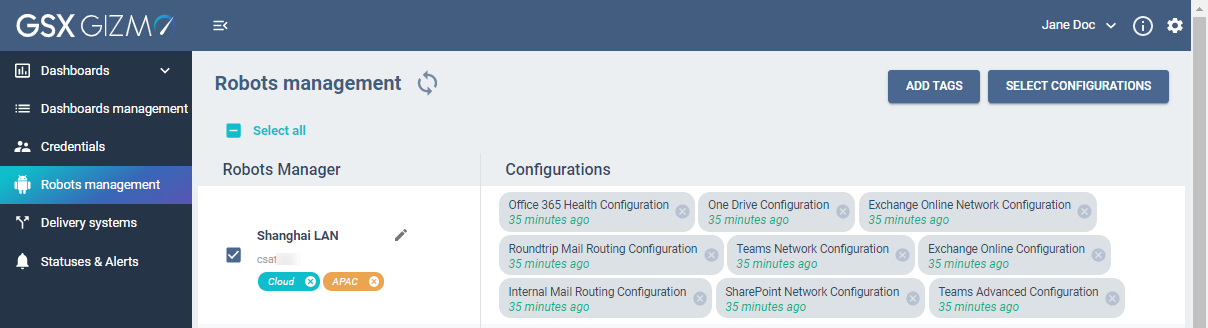
The added tag is now appearing under the dedicated Robot Manager.
Tags can easily be removed by clicking on the little cross in the label.
Adding Delivery System to Robot Managers
Delivery systems are customized alerts created in the Delivery systems page.
This procedure allow you to receive health alerts from Robot managers.
Select the Robot Manager to be configured.
You can select several Robot Managers at once.
Click the Set delivery systems button. The Set delivery systems panel opens.
Select the delivery systems to add in the drop-down list. You can add as many alerts as you need.

Click the Set delivery systems button to confirm.
The added delivery systems are now appearing in the dedicated Delivery Systems column.
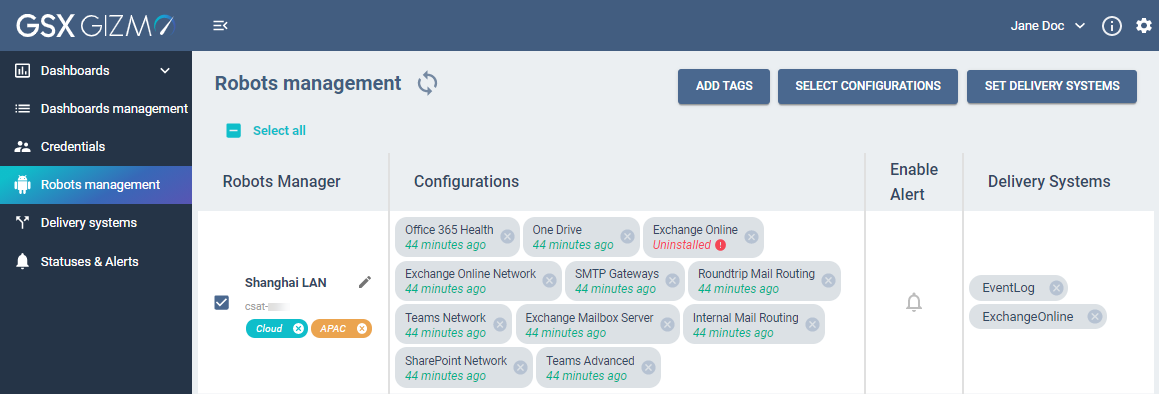
Enabling / disabling Robot Managers alert
Disable an alert if you do not need to receive alerts from a specific Robot anymore.
Click the Bell icon to activate / deactivate the alert dedicated to the desired Robot Manager.