• Common Questions
  • Prerequisites
  • Gizmo Web Application
  • Getting Started
  • Getting Started (on-premises)
  • Knowledge Base
  • Knowledge Base (on-premises)
  • Release Notes
Hide navigation
  • Knowledge Base (on-premises)
    • How-to (on-premises)
      • How to manually failover Gizmo application to another server
      • How to set monitored servers in maintenance
      • How to submit your domain for enabling Single Sign-On (on-premises)
      • How to retrieve last 10 scan results from the Database
      • How to retrieve Robot Manager log and result
      • How to Scan Exchange Online without Autodiscover
      • How to enable HTTPS (with self-signed certificate)
      • Contact GSX Support - Raise a support ticket with GSX
      • How to enable hidden dashboards
      • How to exclude Exchange Server HealthSets
      • How to remove a Robot Manager from Gizmo
      • How to manually register Gizmo in Azure AD for SSO
    • Troubleshooting (on-premises)
      • GSX Gizmo Robot Windows Service is not able to start
      • Troubleshooting a failed installation
      • "User Cancelled Installation" error message
      • Error AADSTS50011 after enabling Single Sign-On
Show navigation

How to enable HTTPS (with self-signed certificate)

Applies to: IIS10+

This should only be done for Lab systems and Proof of Concepts, not on production systems.

This article aims to provide guidance on enabling HTTPS for your IIS server and the “Default Web Site”.

Instructions

  • Open IIS.

  • Click on “Default Web Site”.

  • Click on “Bindings”.

  • Click “Add”.

  • Select “HTTPS”.

  • Select the “localhost” certificate (or create one if need be).
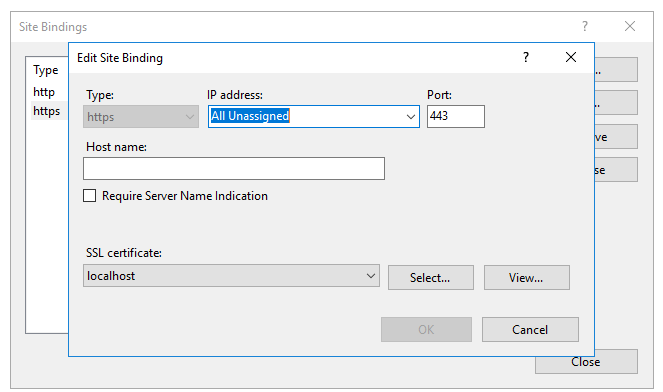
  • Click “OK”.

  • Click “Close”.

You can now access the default web site using “https://”.

Search

    Powered by Instant Websites for Confluence