How to configure a Webhook with MS Power Automate
CLOUD ON-PREMISES
Applies to Gizmo Boston Essential update 1+
This article describes how to create “flows” that are based on trigger events using Microsoft Power Automate.
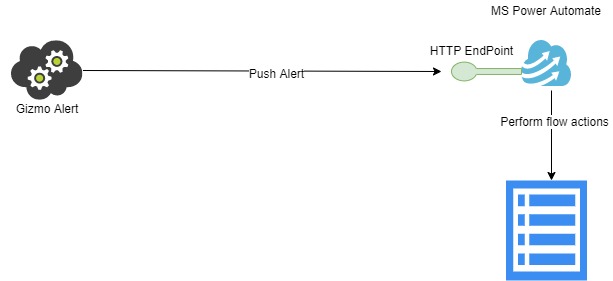
In GSX Gizmo, the Alert service sends Alert results to MS Power Automate and once the Alert received, you can use the provided tasks to transform, store or send the Alert.
Prerequisites
You need a valid MS Power Automate premium account to use a premium connector.
You need a valid license for MS Power Automate to use standard connectors related to Office 365.
You need a flow with at least a configured ‘When a HTTP request is received’ task and one other step.
Creating a flow and configuring the ‘When a HTTP request is received’ task
Connect to MS Power Automate portal (https://flow.microsoft.com/)
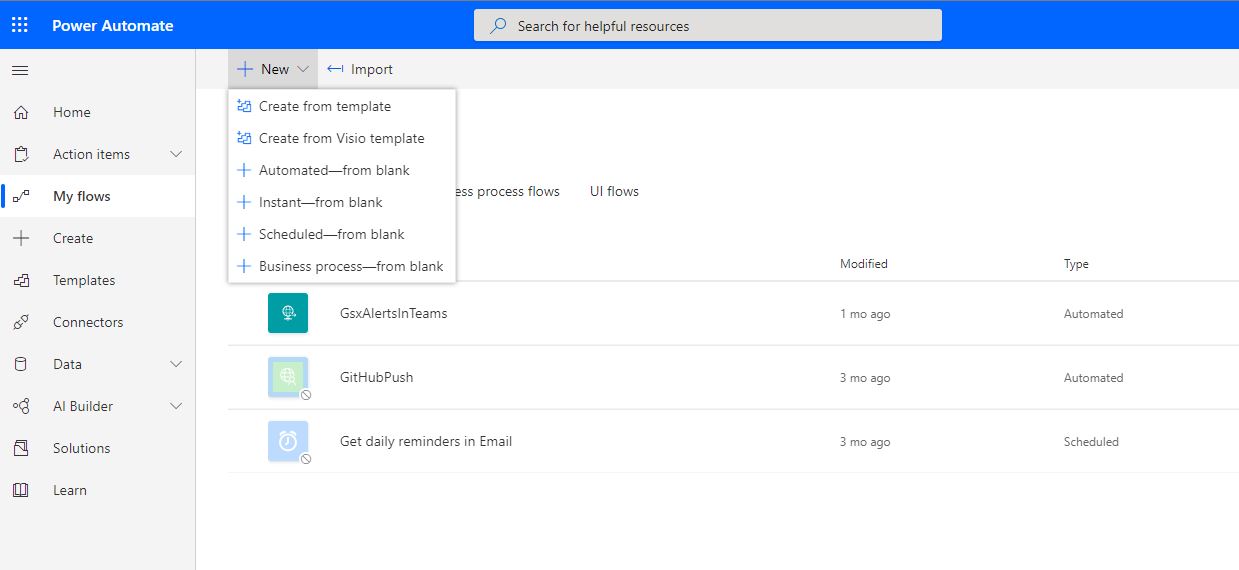
Go to MyFlow > New > Instant from blank
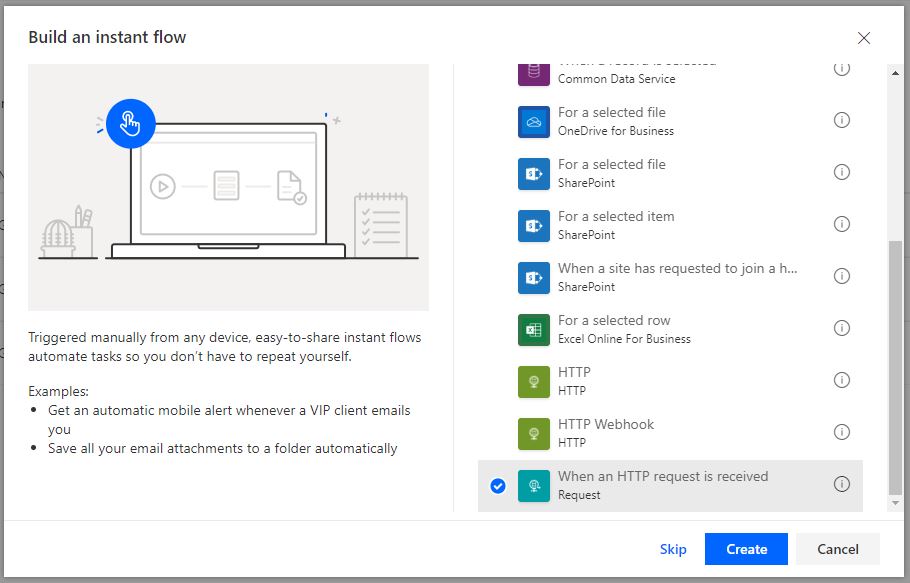
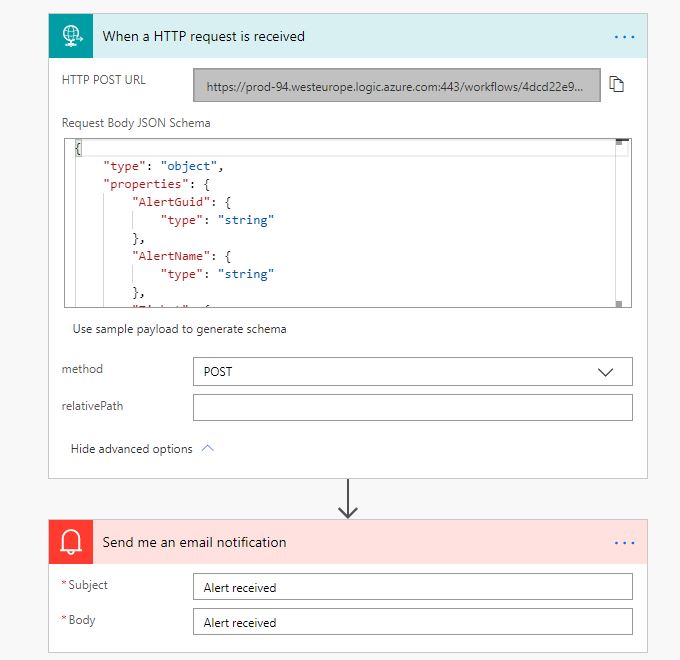
Fill the Flow name and scroll to the ‘When a HTTP request is received’ task.
Click the Create button.
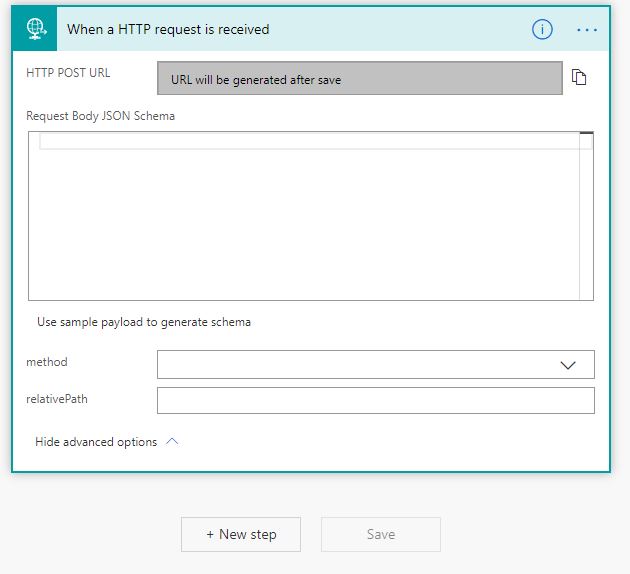
Click on the task to configure in the Request Body JSON schema and choose REST Method.
The Request Body JSON schema represents the Alert Result JSON schema sent by the Gizmo Alert (see below).
{
  "type": "object",
  "properties": {
    "AlertGuid": {
      "type": "string"
    },
    "AlertName": {
      "type": "string"
    },
    "Ticket": {
      "type": "object",
      "properties": {
        "TicketId": {
          "type": "integer"
        },
        "CreationDateUTC": {
          "type": "string"
        },
        "Status": {
          "type": "integer"
        },
        "RulePriority": {
          "type": "integer"
        }
      }
    },
    "RuleName": {
      "type": "string"
    },
    "RuleMessage": {
      "type": "string"
    },
    "ComposedStatusResult": {
      "type": "object",
      "properties": {
        "StatusGuid": {
          "type": "string"
        },
        "StatusName": {
          "type": "string"
        },
        "GlobalStatus": {
          "type": "integer"
        },
        "DisplayStatus": {
          "type": "integer"
        },
        "CalculationDateUTC": {
          "type": "string"
        },
		"Messages": {
			"type": "array",
			"items": {
				"type": "object",
				"properties": {
					"Message": {
						"type": "string"
					},
					"Level": {
						"type": "integer"
					},
					"Sublevel": {
						"type": "array",
						"items": {
							"type": "object",
							"properties": {
								"Message": {
									"type": "string"
								},
								"Level": {
									"type": "integer"
								},
								"Sublevel": {
									"type": "array",
									"items": {
										"type": "object",
										"properties": {
											"Message": {
												"type": "string"
											},
											"Level": {
												"type": "integer"
											},
											"Sublevel": {
												"type": "array"
											}
										},
										"required": [
											"Message",
											"Level",
											"Sublevel"
										]
									}
								}
							},
							"required": [
								"Message",
								"Level",
								"Sublevel"
							]
						}
					}
				},
				"required": [
					"Message",
					"Level",
					"Sublevel"
				]
			}
		}
      }
    }
  }
}
|
|---|
Choose POST as Method.
To save the flow, we must add at least one other action, so we can add a notification.
Click New step.
Choose Notifications > Send me an email notification.
Fill the Subject and the Body.
Click Save.
Click on the ‘When HTTP request is received’ task.
MS Power Automate generated a HTTP POST URL.
You have now created your first Webhook in MS Power Automate!
Next step is to configure the Delivery system in the Web Application.
Configuring the Delivery System in Gizmo
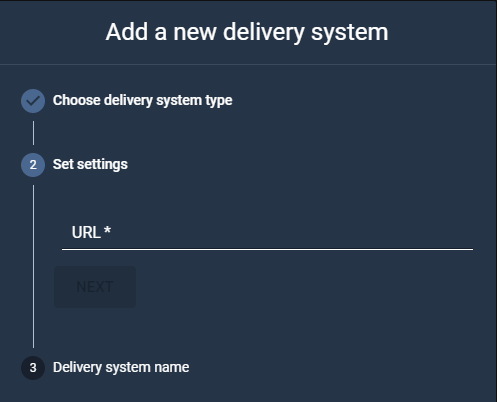
In the panel, select the Webhook type. Then click Next.
URL: Fill the URL parameter with the URL generated in the MS Power Automate 'When HTTP request is received’ task.
Name the Delivery system.
Click Add.
The Delivery system is now added to the list.
